Old fashion hand quilting is a fundamental skill involving time, patience, and care. Still, the result is well worth the effort. It is an ancient technique that is thought to have been discovered around 3,400 BC. And despite the surge in modern culture, it is still used by many craft lovers.
Don’t worry if you’re new to sewing and don’t know how to make a quilt without a sewing machine. Learning to quilt by hand has been made easier now since we’ve devised a simple technique that’s not only popular but also convenient and quick.
Do you have a particular question about making a quilt without a sewing machine? Then use the table of contents below to jump to the most relevant section. And you can always go back by clicking on the arrow in the right bottom corner of the page. Also, please note that some of the links in this article may be affiliate links. For more details, check the Disclosure section at the bottom of the page.
A step-by-step guide to help you make a quilt by hand
Choose The Fabric
The first and most crucial step before understanding how to hand quilt is to choose the fabric for your hand-stitched quilt. You can choose cotton, fleece, or something heavier, depending on your preferences.
Select A Pattern
Now think about a design for your hand-piecing quilt. You can sketch the idea on plain paper or take the help of a book or the Internet for your hand-sewn quilt patterns.
Size Of The Quilt
Make a rough estimate of the size of the quilt you wish to make. Is this a baby quilt, a lap quilt, or a queen-size quilt for a full-size bed? A full-size bed can be as long as 80 inches. If you want your hand-sewn quilt to hang over the bed’s sides, it will need to be 85 inches long when finished.
Cut The Squares
Begin cutting the squares according to the quilt’s size. Ensure that all of the squares are the same size. You can cut them up to 5 inches long, depending on the quilt size. And since you’ll need some additional room for the quilt to be made, it’s a good idea to add an inch to the square of your hand-sewn quilt. Also, make sure you have some lovely cotton fabric on hand for the back of the squares.
Begin With The Stitching
Place the batting or filling (wool or polyester) between the square and the quilt backing before you begin hand-stitching the quilt. This will make the project easier and less hectic for you in the end and will save you a lot of time. After that, try laying out a grid and anchoring your squares to the quilt’s backing with a safety pin for the best results.
Hold the needle with your controlling hand, place the other hand at the bottom of the quilt, and start quilting by hand. Insert the needle in the three layers of the quilt, and before pushing it through the fabric below, pierce the needle back up to the top of the quilt. Push it through, and you’re done with your first stitch. Now repeat the same until you get done with quilting by hand.
Moreover, make sure your stitches are small and even. If you’ve just learned how to start quilting by hand, then start with 5 stitches per inch and progressively increase the number of stitches as your stitching skills develop.
Since handcrafted items take a long time to complete, don’t rush the process and take your time, as it may take several weeks.
Where to start hand quilting?
Starting hand quilting in the center is always a smart option if you want a smooth and precise finish. Hand quilting instructions require extra attention because, unlike machine quilting, it may not always produce an exact result, especially if you’re a beginner. Starting your hand-sewn quilt from the center ensures a seamless finish and an evenly distributed quilt with no bubbling in the middle. It’s also a good idea to use thread or safety pins to secure your squares to the quilt’s backing for a seamless finish.
Types of quilting by hand
Following are some popular types of quilting for hand-sewn quilts for beginners. We are going to cover all of them in this article, but it’s good to know what’s out there:
- Machine quilting
- Hand quilting
- Longarm quilting
- Free-motion quilting
- Art quilts
- Appliqued quilts
- Amish quilts
- Charm quilts
- Pierced quilts
- Embroidery quilts
- Baltimore album quilts
- Crazy quilts
How to patchwork quilting?
If you don’t know how to hand-stitch a quilt, here’s the solution. Start cutting 5 inch long squares after deciding on the fabric and quilt size. After that, begin patchworking your quilt. Before sewing the squares together, simply decide on a layout. Each row should have 6 squares, and the color scheme should be adjusted accordingly.
If you want a smoother finish, press the fabric before cutting it. It will smooth out all of the fabric’s creases, allowing you to arrange your squares in neat, straight lines.
Now, begin from the top row and stitch the squares using a ¼ seam allowance. Try stitching the rows together now that you’ve finished stitching 6 squares for each row. Continue sewing the rows together until you have a finished quilt top.
For the finishing touch, you’ll need a quilt backing. The backing should be larger than the quilt you’ve made. If you wish to make a large quilt, add 4 inches of extra fabric to each side of the quilt.
What is hand quilting?
Hand quilting uses a thread and a needle to sew three layers of fabric together (the top fabric, the backing, and the filling). To make a full-size hand quilt, you’ll need to stitch through these layers several times.
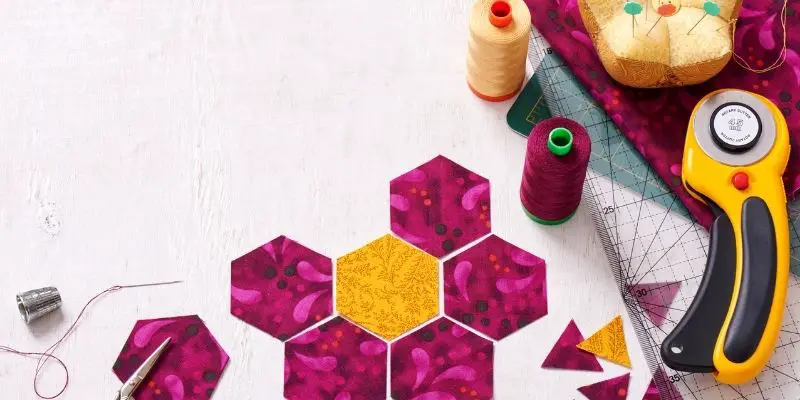
What are the basic supplies for Hand-Quilting?
If you’re going to learn to hand quilt following are the few essential items that you need to get your hands on%
- A needle of required size 9 or 10
- Cotton threads
- The fabric of your choice
- A thimble
- Scissors
- Fabric markers
- Pins
- A ruler (for exact measurements)
How long does it take to quilt by hand?
The amount of time it takes to finish your quilt will vary depending on the size and complexity of the pattern. A baby quilt could take a day or two to complete depending on your skill level. On the other hand, larger quilts might take months to complete, especially if you have just started learning how to quilt by hand. But, regardless of the time frame, the outcome will be worth the effort and time if you don’t rush the procedure and finish it gradually.
Credits: photos by Canva

Disclosure: at sewingyourstyle.com we only write about the products that we’ve researched and considered worthy. But it’s important to mention that we are a participant of several affiliate programs, including Amazon Services LLC Associates Program, an affiliate advertising program designed to provide a mean for us to earn fees by linking to Amazon.com and affiliated sites. As an Amazon Associate sewingyourstyle.com earns from qualifying purchases.