DIY projects can be fun and save you a lot of money. Making your own DIY patches can allow you to customize jeans, shirts, hats, bags, and even jackets. So here is a look at some of the things you may want to know about creating your own DIY patches.
Are you interested in a particular question about making DIY topics? Then use the table of contents below to jump to the most relevant section.
And you can always go back by clicking on the grey arrow in the right bottom corner of the page. Also, please note that some of the links in this article may be affiliate links. For more details, check the Disclosure section at the bottom of the page.
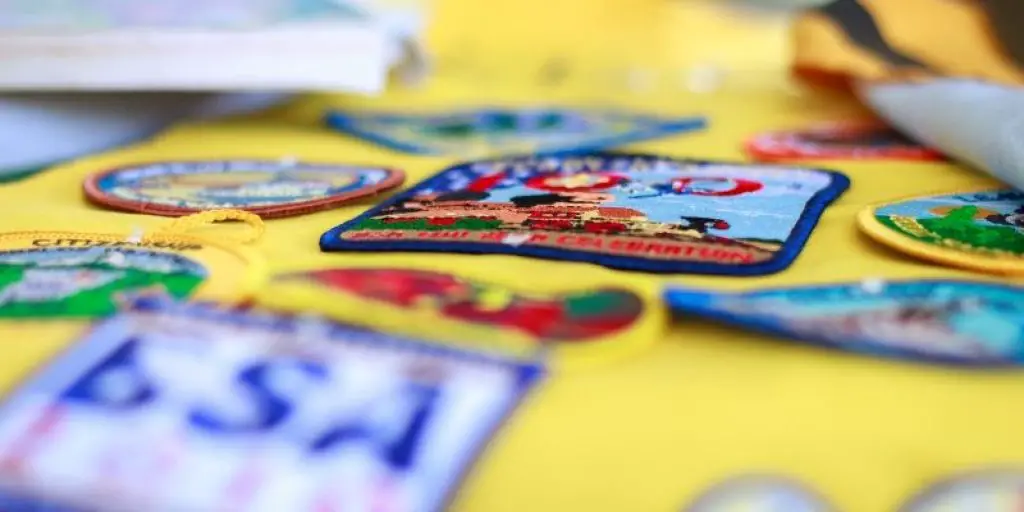
What are embroidery patches?
Embroidery patches are small works of art that are created by using a fabric backing thread and a needle. These patches can be sewn on, pinned on, ironed on, or velcro on depending on how permanent you want it to be.
Embroidery patches can either be made by hand or by an embroidery machine.

Pros and cons of DIY patches
Like everything in life, there are some pros and cons of do-it-yourself patch making. Here is a look at the good and the not so good of making your own patches to use as part of your fashion statement.
Pros
- There are a variety of different types of patches, making it possible for just about anyone to create their own DIY pieces.
- Making your own patches may be less expensive than purchases already made ones.
- When making your own DIY patches, you are limited only by your imagination
- It’s a fun project to do and gives you a sense of accomplishment, knowing you created something unique to you.
Cons
- Some types of patches such as embroidery ones can be very time consuming
- Your results can be limited by your skills
- To make professional looking patches, it will take some practice.
4 Ways to make DIY patches
There are several ways to make DIY patches, and here is a look at 4 different ways to make these patches.
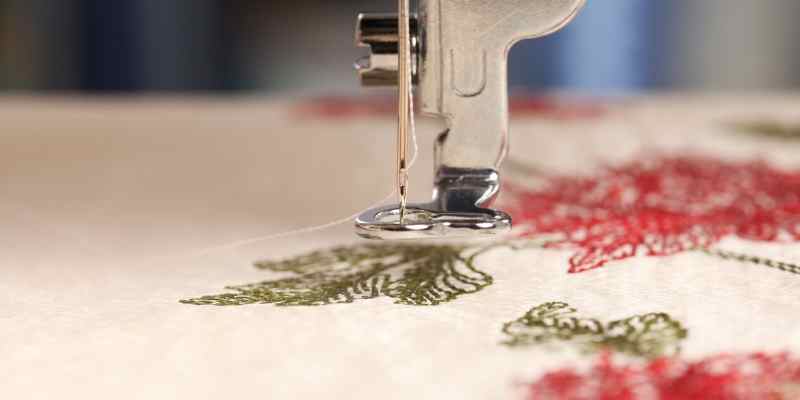
How to make patches with an embroidery machine
If you own an embroidery machine, then it can be a relatively easy project. You will only need a few things. Digital detailed patch design, sharp needle, sturdy fabric, such as canvas (we talk about more options later) and water-soluble stabilizer (e.g., one).
Here are the main steps:
1. You begin by choosing your digital patch design and loading it into your embroidery machine.
2. Next, you place your water-soluble mesh in the proper size hoop,
3. You then embroider a placement line directly onto your water-soluble stabilizer.
4. Once that is done, you place your patch fabric over the placement line and tack the patch down to the stabilizer.
5. Edge around the outside of the material using a zig-zag stitch to connect the patch fabric to the water-soluble stabilizer.
6. Then cut around the fabric with scissors close to the tack down stitches.
7. Stitch elements of the patch finishings with a satin border
8. Soak it to remove the stabilizer.
Your patch is now complete and ready to sew on your choice of clothing or to have an adhesive back placed on it.
Here’s also a great video tutorial if some of the steps are still a bit confusing:
Paper patches
Paper patches, also known as transfer patches, are the most manageable DIY patches of all. Unlike the name sounds, paper patches are not actually made from paper. Instead, the design is made on paper and then ironed onto the material. This allows for various size patches as well as you’re being able to use personal pictures to create patches. There are several things you might need for the project. The artwork you choose, sturdy fabric material (or you can transfer right onto the clothing), and the transfer paper, like one.
And are the steps to make your paper patch:
1. Choose your artwork, look for a simple, colorful design with distinct lines
2. Take a picture of the artwork and upload it to your computer. Use the computer’s editing program to size the photo to the patch size you want.
3. Load the transfer paper into your printer and print out the image letting it dry thoroughly before continuing
4. Cut out the patch size design from the rest of the transfer paper
5. Place the transfer image face down on your patch fabric (on an ironing board). Follow the instructions that come with the transfer paper.
6. Peel off the transfer paper and let the picture to dry on the patch
Make sure that your patch material is either a material that will not shred along the edges or that the edges are bound in some way to keep the patch from unraveling.
DIY iron-on patches
Iron on patches is pretty much similar to paper patches. However, you can purchase a whole bunch of ready-made designs to personalize any garment. It cost really little, and you will have lots of creative fun with it.

But in fact, you can turn any handmade piece into an iron-on patch by using . All you will need is the adhesive, an iron with an ironing board, a clean towel or a piece of butcher paper and a pair of scissors
Here’s how you do it:
1. Lay your patch face side down on your ironing board
2. Place the Heat and Bond Adhesive on the patch and cover with the clean towel or butcher paper
3. Set your iron on silk setting and let it heat up
4. Iron over the Adhesive paper, so it adheres to your patch. Make sure that you get the heat on the entire piece, so the adhesive will be transferred to the entire surface.
5. Trim the paper around the patch till it’s the same size as the paper.
6. Peel off the paper and place your patch onto the material you want to adhere to.
7. Again place the towel or butcher paper over your masterpiece. Thus you’ll keep any dirt that may be on the iron from transferring. Iron over the entire patch to adhere it firmly to the article of clothing you want it on.
How to make embroidered patches by hand?
Making embroidered patches by hand is fun and easier than you may think. You will need some tools though:
- an appropriate size embroidery hoop (the set like might be handy, so you’ll never run out of options)
- patch material slightly larger than the hoop,
- some type of marker to create your design, (you can use an of the design, too)
- fabric paint to match your design as well as black fabric paint for outlining,
- embroidery needle,
- embroidery thread in colors needed for the design.
- a pair of scissors.
And here’s how you do it:
1. Place your patch material inside the embroidery hoop, so the cloth is stretched tight
2. Draw the design you want on your patch the size you want your piece to be
3. Outline the picture with black acrylic or fabric paint
4. Color the insides to match the embroidery thread you will be using
5. Use a satin stitch to fill in your design
6. Cut out your patch
7. You can use a whip stitch around the outside of your piece to prevent fraying
8. Use on the back of the patch to make sure that the threads remain in place.
To see how easy it is to make embroidered patches by hand, you can also check out this video:
Best fabric for patches
There are many different materials that you can use to make patches. Here is a look at some great patch fabrics:
Twill. It’s a type of textile with diagonal parallel ribs.
Felt. It’s an excellent material for patch making since it doesn’t fray after it is cut.
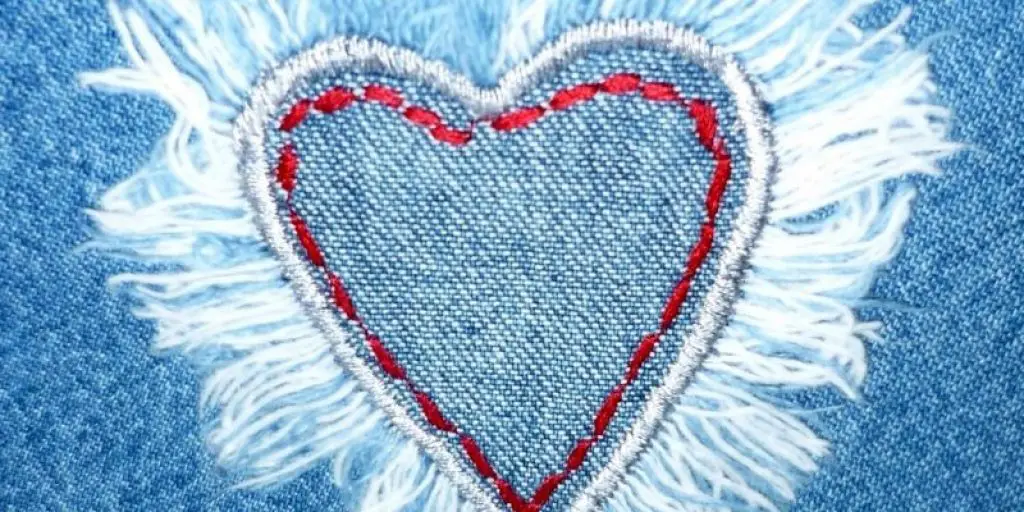
Denim. This one tends to be thicker material that makes it ideal for creating patches. However, since denim does fray, you will need to use a fabric sealant on your design. Whip stitches on the edge of your patch will ensure long-lasting fray proofing.
Canvas. It’s a durable cloth that is usually unbleached. It is great for making patches. However, just like denim, it does fray, so you will want to use fabric sealant on the cut edges of your patch. And perhaps whip-stitch the edges as well.
Patch making kit: essentials to get you started
What you will need to get started with DIY patch making is going to depend on the type of patches you plan on making. So here is a list of the essentials you need to get started:
Patch making kit if you are using an embroidery machine
· Digital patch designs of your choice
· Embroidery machine with a sharp needle
· Water soluble stabilizer (e.g., one).
· Sturdy patch fabric
· Scissors
Paper Patches essentials
· Artwork
· Transfer paper, like one
· Sturdy patch material
· Printer (Inkjet)
· Scissors
Hand Embroidery
· Embroidery hoop, e.g., from the set like
· Patch material
· Some type of drawing utensil
· Fabric or acrylic paint
· Embroidery needle
· Embroidery thread
· Fabric glue pen, one is quite great
· Scissors
Additional material to have on hand
·
· Heat and bond adhesive for making iron-on patches
How to sew on a patch by hand?
Sewing on a patch by hand assures that the piece will stay permanently in place. Attaching a patch to any article of clothing by hand sewing it is actually not difficult, it just takes a little time and attention.
You need to choose a color of thread that matches the outer border of your patch. Take a sewing needle and thread it through the eye using enough yarn to double it. Tie a knot into the double thread at the bottom
Place the patch on the desired piece exactly where you want it. Use pins to the hold the design in place (You can also hold it in place with fabric allowing the glue to dry before you start sewing)
Start at the back of the fabric. Push the needle through the material into and through the edge of the patch. Push the needle back down through the piece into the fabric, making sure you are making even tiny stitches. Continue stitching all around the outside of the patch.
If you still need a bit more visual guidelines you can check this video too:
Credits: cover photo Canva
Disclosure: at sewingyourstyle.com we only write about the products that we’ve researched and considered worthy. But it’s important to mention that we are a participant of several affiliate programs, including Amazon Services LLC Associates Program, an affiliate advertising program designed to provide a mean for us to earn fees by linking to Amazon.com and affiliated sites. As an Amazon Associate sewingyourstyle.com earns from qualifying purchases.