Stabilizers are backings that provide support to your fabric by holding it flat. The main goal of fabric stabilizers is to give your stitched creation a finished and neat appearance at the end of the job. Without an embroidered stabilizer, the final product would look rather messy.
Depending on the type of fabric, these embroidery stabilizers might be either permanent or temporary.
Permanent backings are added after the design is sewn on and usually wash out.
On the other hand, temporary backings are used to keep the stitches from puckering and bunching before starting the craft. These backings are easily removed once the design is finished.
Do you have a particular question about the using fabric stabilizers? Then use the table of contents below to jump to the most relevant section. And you can always go back by clicking on the arrow in the right bottom corner of the page. Also, please note that some of the links in this article may be affiliate links. For more details, check the Disclosure section at the bottom of the page.
What is embroidery stabilizer?
Embroidery stabilizer gives your embroidery project a stable foundation, especially if you’re working on a thin or stretchy piece of cloth. It keeps your fabric from fraying and ensures that your stitches are neat and tidy at the end of the work.
For both machine and hand embroidery, it’s a must-have as it improves your final output and reduces your chances of making mistakes.
There are several different types of embroidery stabilizers, each with a varying weight depending on the use.
Why Do You Want To Use Fabric Stabilizer?
A fabric stabilizer is essential to add more beauty and longevity to your creative creation. It will not only make your embroidery creation easier to complete, but it will also give it the shape and volume you desire.
How to use fabric stabilizer?
Before discussing how to use a stabilizer, know that fabric stabilizers come in four categories.
- cut-away
- tear-away,
- wash-away,
- heat-away
And applying these fabric stabilizers is as easy as you’ve imagined. You just need to place the kind of stabilizer you prefer on the wrong side of the fabric before stitching the garment. This will keep your material in place while stitching, preventing it from getting twisted and messy.
How to use embroidery stabilizer in particular?
It’s as simple as it sounds to use an embroidery stabilizer, and it adds beauty to your product by giving it a tidy appearance. Embroidery stabilizer is frequently used on elastic textiles to hold them in place and avoid twisting. All you have to do is hoop your preferred stabilizer on the wrong side of the cloth and start crafting, whether using a machine or doing hand embroidery. The excess stabilizer is cut off once you’re done.
Stabilizer vs. interfacing
The differences between a stabilizer and interfacing are significant. To begin, a stabilizer should be taken off or removed from the fabric once your embroidered work is completed. This is not the case with interfacing, which is designed to stay bonded to the garment for the duration of its life.
Interfacing gives thin and weak materials structure and shape, making them stiffer and heavier. On the other hand, a stabilizer prevents your fabric from stretching by providing it with a backing.
Stabilizers are also employed in craft projects like needlework, while interfacing is utilized in clothing projects to provide a body.
How to use tear-away stabilizer?
As the name implies, a tear-away stabilizer aw is a type of stabilizer that is designed to be taken from your fabric once you’re done. It’s simple to use and available in various weights. To give ground to your material, you can use a single or numerous layers of tear-away stabilizer, depending on your project.
Using a tear-away stabilizer is quite easy. First, place the rip-away stabilizer’s adhesive side on the fabric’s wrong side. Now you may start embroidering your fabric by placing it in the embroidery hoop. This will keep your material in place during the entire process.
You can use Tear Away Embroidery Stabilizer Backing to spice up your embroidery game.
Best quilting stabilizer and tips for using it
Yes, you heard that right. Apart from machine embroidery, you can use stabilizers in quilting as well. This allows your quilt to achieve a sturdy foundation and a more professional look.
Following are some of the best stabilizers for your quilting projects. Apply any of them and see how they change the overall look of your quilting project for the better.
- Water-soluble stabilizer
- Iron-on stabilizer
- Cutaway stabilizer
They all serve the same purpose of backing your quilt, although having slightly varied qualities. And while the three stabilizers mentioned above do a good job, we still have a favorite among them: iron-on stabilizers. It’s a go-to quilting stabilizer that produces the best results.
An iron-on stabilizer is extremely fusible and helps to tame elastic materials while quilting by supporting the thread weight. Here’s a pro trick to ensure you receive the best results from an iron-on stabilizer.
An iron-on stabilizer should be applied to a quilt at a medium temperature to ensure it has been adhered to. Here’s a helpful hint since it’s better to be safe than sorry. Apply iron-on stabilizer to a tiny section of cloth to ensure it will tolerate it and will simply release once ironed.
Speaking of which, Interfacing Lightweight Fabric for Quilting is one of the best quilting stabilizers, which is easy to use and apply and adds stability to your quilting project.
Best wash away embroidery stabilizer
Wash-away stabilizer, also known as a water-soluble fabric stabilizer, is one of the most efficient machines or hand embroidery stabilizers for giving your craftwork a solid back. It not only handles difficult and tricky fibers nicely, but it also washes away completely.
It dissolves quickly in water after performing its purpose as a backing because it is constructed of water-soluble fibers. It also eliminates the stress of picking up little pieces from the back of intricate embroidered designs. It is, however, more suited to thin, delicate textiles than to coarse, flexible ones.
Removing it once you’ve completed your project is also incredibly simple. Simply cut the stabilizer as close as possible to the embroidery pattern, then put it under running water to watch how quickly it dissolves. When removing it for the first time, make sure you eliminate all signs of it. Why is this the case? Because the portions of a washable stabilizer that are left out tend to dry out and get stiff, you may not be able to remove it once it has dried.
Aside from that, here’s a helpful hint. Here’s some good news for you if you want to recycle things. You can obtain a liquid spray stabilizer to use in place of the tiny bits of water-soluble stabilizer.
And if you are wondering which wash-away embroidery stabilizer should you go for, worry not. We have got you covered. Wash Away Embroidery Stabilizer is one of the best wash-away stabilizers for hand embroidery that needs thorough removal of the stabilizer once you’re done.
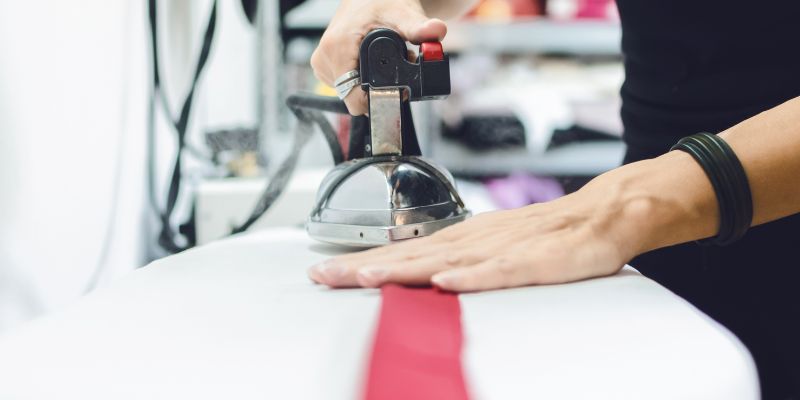
Best iron-on fabric stabilizer and why use it?
Another stabilizer is an iron-on fabric stabilizer, which may be applied to the back of a fabric with a medium-heat iron. Iron stabilizers are available in a variety of weights and provide fabric stability. You can use one or the other depending on the weight and texture of your fabric.
Because iron-on stabilizers offer your garment more firmness and body, they’re handy for fragile materials. It also helps align your patterns and avoids shrinkage, making it ideal for your embroidered work.
You can get your hands on Pellon Iron Stabilizer, which helps give your crafts more body and extend their lifespan.
When do you use a sew-in stabilizer?
Sewing stabilizers are known for their incredible ability to give your fabric sturdiness. Sew-in stabilizers can also offer crisp support to hat brims, tote bags, and needlecraft backings, in addition to clothes. They range in weight from mid to heavyweight and can be employed depending on the nature of the project.
Credits: photos by Canva

Disclosure: at sewingyourstyle.com we only write about the products that we’ve researched and considered worthy. But it’s important to mention that we are a participant of several affiliate programs, including Amazon Services LLC Associates Program, an affiliate advertising program designed to provide a mean for us to earn fees by linking to Amazon.com and affiliated sites. As an Amazon Associate sewingyourstyle.com earns from qualifying purchases.